
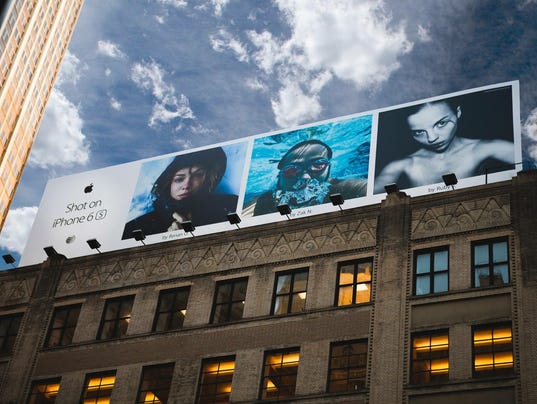
It should be easier than ever to take gorgeous, frame-worthy photos right from your smartphone. That’s what Apple’s giant “Shot on iPhone” billboards suggest.
If that’s the case though, why do so many of the nearly 20,000 photos I’ve shot on my own iPhone over the past few years mostly suck? Because the very people who took those billboard shots have a few genius MacGyver-esque tricks up their snapshot sleeve.
“It’s not like you just ‘point and shoot’ your cell phone and end up with a billboard,” says National Geographic photographer Renan Ozturk. He should know. He snapped this stunning photo of his wife, Taylor Rees, that’s featured on (you guessed it… ) an Apple billboard.
“One of the things that’s really hard to do with a mobile device, is get a photo that looks like it was taken with a professional camera.” Hard? Yes. Impossible? Absolutely not, even for a complete newbie like me. I met Ozturk, Rees, and a handful of other noteworthy smartphone sharpshooters, during a week-long photography workshop in Cuba — one of the most photographically stunning places in the world.
Tired of the Instagram-envy, and determined to up my own smartphone-photography game, I packed my iPhone 7 Plus, an awesome solar-powered battery charger, and a handful of hair-ties (this will make sense as you read on, I promise). Here are six absolutely genius smartphone photography hacks the pros taught me. And one I even taught them too!
1.Tired of always taking the pictures and never being in them?
Me too! Looking back at my vacations over the past several years, it’s almost like I wasn’t there. I’m hardly in any of the shots, alongside my husband, daughter, friends, and family, because I’m always the one taking the photos. I used to rely on the self-timer that’s now built in to most smartphone cameras. But miss the countdown and it’s retake city. And for couples shots? That obnoxious selfie-arm pose — out of the question.
The fix: Use a Time Lapse App
“The hack for taking great group or couples shots is to download a time lapse app,” Ozturk showed me. “Not the built-in timelapse app that’s native to a lot of phones like the iPhone, but an app that takes full resolution photos on an interval.”
Why? Ozturk explained that rather than having just one shot with a timer that you have to reset every few seconds, time lapse apps do it all for you. “You can move around, even turn that into a movie afterwards, or just take single resolution shots that you can print out after for your family or yourself,” Ozturk added.
There are several Time Lapse apps available for iOS and Android, but I like Hyperlapse from Instagram (free) and Microsoft Hyperlapse for Android (free) best, mainly because of added features that smooth out bumpy shots.
Also, I found out the hard way why Ozturk doesn’t recommend the built-in timelapse feature. Most of the shots we took with took with the built-in feature have only one of our faces in focus, even though we set focus beforehand. The apps fixed that.
2. Your photo’s blown out (too dark or too light)
I saw a great scene here with a bright pink classic car in Cuba and happy looking local sitting on a curb behind it. So I pointed, and snapped. This picture could have been really neat, if the car hadn’t been totally blown out. Try as I might to recapture that vibrant, picture-perfect-pink color, later with a photo editing app, it was gone forever to overexposure.
The Fix: Tap the screen, and bring the exposure down manually
If you find yourself in a similar bind, it’s time to tap. Tapping on your target will let you adjust the exposure by moving your finger up along the side of the line next to the sun. Adobe pro, Josh Haftel, taught me this one, “It’s much better to slide the little sun icon down and make the picture darker. That way, all of the details are still there and you can recover them with really easy editing tools.”

Another Fix: Use your sunglasses
You can tackle a bright reflection with a tap, but beams of sunlight, or a bright sky contrasting against a dark city, can absolutely kill your smartphone’s ability to adjust exposure correctly. Again, beating it is so simple, you’ll slap yourself for not thinking of it sooner — just use your sunglasses. Just like your eye, the camera lens is doing its best to fight the light and failing, so hold one of your sunglasses lense right over the camera. It’ll dim the blinding light and take your photo from disastrous to delightful.
3. Your photos are just…boring
Good photographers know that often the best shots pull your eye to one particular part of a shot, and they often often use a bunch of fancy lenses to create the effect of blurring out the background, or foreground of a shot, to make the subject super sharp and crystal clear. But smartphones put everything in focus at once. What are we supposed to do?


The fix: Portrait Mode
“Portrait mode on an iPhone works great if you’re about eight-feet or less away from your subject and really just want the background blurred out,” Haftel explained.
Another fix? Turn the camera upside down and set it down!
But portraits are for people mostly so it doesn’t work well with landscapes or objects. Try turning your phone upside down and setting it on the ground. This genius hack blurs the foreground and “brings your eye right to a certain part of the photo,” says Ozturk.
4. It’s out of focus
Okay, I know we’re in Cuba, but the example I want to show you for this one comes from a little farther north. My mom went on a bear-watching trip near her home in Alaska recently and, bless her heart, sent me these wonderful, albeit out-of-focus snapshots she took with her iPhone.


The fix: tap the screen where you want it to focus
That’s right. Tap and focus. No more blurry faces and bears while the trees and grass in the foreground look perfectly sharp. This works the same whether you’re on an iPhone or Android.
5. Your video is super shaky
I learned the hard way that shooting videos on a bumpy backroad is an exercise in frustration. What did Ozturk suggest?
The Fix: Hyperlapse apps
The same Hyperlapse apps that take great time lapse shots. Turns out, they are equally as good for stabilizing shaky video, even footage already shot.
6. Your photo still doesn’t look billboard worthy?
This is hands-down, the biggest game-changing hack I learned in Cuba. To get a billboard- worthy photo that rivals the pro’s, you have to edit — even a tiny bit. It sounds like too much of a hassle, but it’s easier than you think. Ozturk told me the Lightroom app for iPhone and Android by the photo masters at Adobe is your go-to here.
The Fix: Editing
“A lot of professional photographers know Lightroom,” he says. “Now they make lightroom as an app that you can have on your phone and it has all of the same functionality, all of the same power, I don’t even have to use my big computer anymore.” A quick download and a few taps later, my new photographer friend took my newly shot photos from better to breathtaking.
So what did he do? “Gradient filters, in the sky or water, bringing out the whites of someone’s eyes in the portraits, and then just selectively bringing the saturation up for certain colors and not others. I think of it like finger-painting for adults.”
Here’s a great example of the “before and after” the Lightroom mobile app edit:


7. Here’s the one I taught them: no tripod, no problem!
I have long hair, and I never go anywhere without an elastic hair-tie or plastic clip of some sort. These are perfect for engineering a makeshift tripod on the go. Wrap your phone around a glass of water, or hack it to just about anything stable – your wallet, handrail or even to a 17th century canon in historic Fort Havana, and voila! Instant tripod.
This article and video originally ran in USAToday.com. I’ll post an updated slideshow of all my Cuba smartphone photos later this week!