With all the gadgets that dominate our daily lives, sometimes you just need to snap a quick screenshot to share with someone, post to Twitter, or save for later. Saving an image of your screen is a handy way to save important info from the web for later browsing, especially on mobile, and it’s also useful for sharing funny stuff you find online without sending someone a full link and making them find it for themselves. Thankfully, iOS, Mac, Android, and Windows all have fast and easy screenshot functions built right in, and here’s how to use them.
iOS (iPhone, iPad)
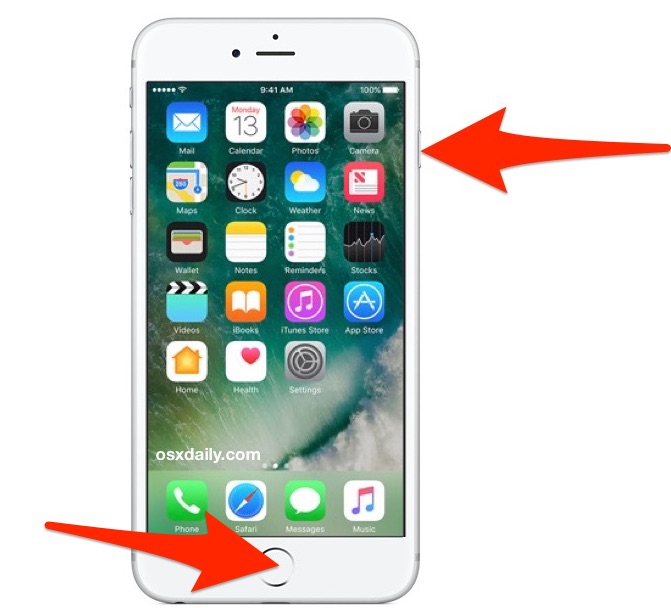
iOS makes it super simple to grab a pixel-perfect screenshot of your screen any time you want. All you have to do is briefly hold down the home button on your device, be it an iPhone, iPad, or iPod Touch, and then press the lock button (also known as the power button). You’ll see the screen flash briefly and if you have your volume turned up you’ll also hear a camera shutter sound. The image is saved directly to your camera roll, and you can take multiple screenshots in quick succession without worrying about manually saving them one at a time.
Android
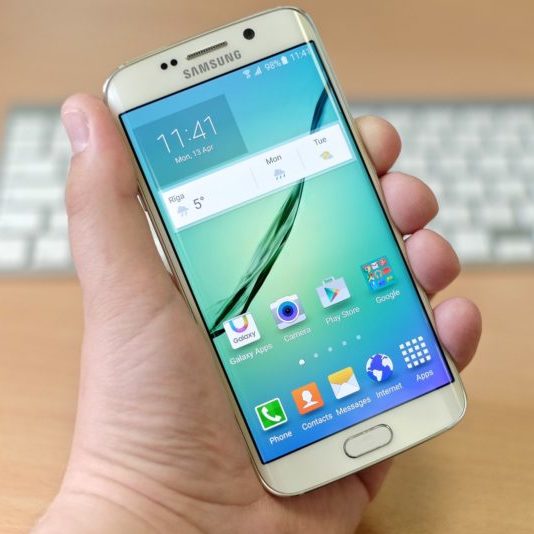
Like its iOS counterpart, Android has an easy two-button screenshot feature that works in much the same way. All you have to do is hold down the power button and press the volume-down button at the same time. Just like on iPhone, you’ll see a screen flash and the image will be saved to your phone’s photo gallery. On Android phones that have a physical home button (the button that sends you back to your main home screen), sometimes that button is used in place of the power button, so if the power+volume trick doesn’t work, try holding down the home button and pressing the volume-down button simultaneously instead.
It’s important to note that, depending on the specific phone and version of Android you’re using, what happens immediately after you snap the screenshot can differ. For example, some phones will automatically open the screenshot image in the gallery, while others will just show a pop-up notification alerting you that a screenshot was taken.
Windows
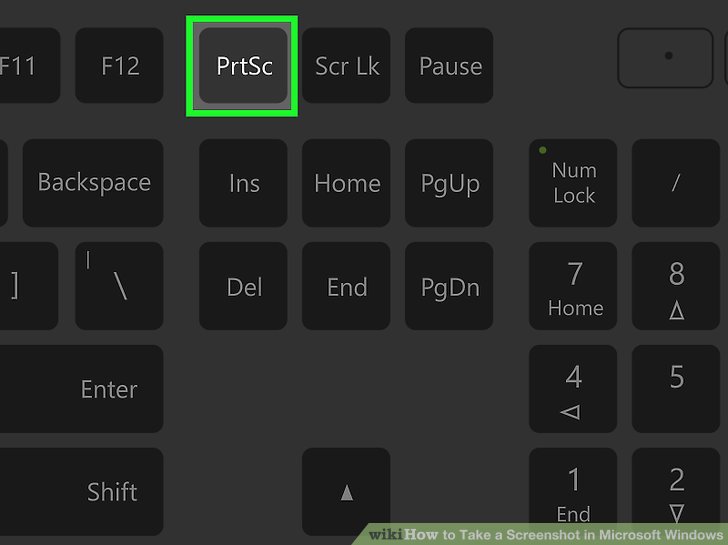 On Windows machines, grabbing a screenshot is a bit different than it is on mobile devices. To snap the image, just hold down the Control key and tap the Print Screen key (labeled PrtSc or PrtScn). Doing so will capture an image of your entire desktop. If you want to capture an image of just the window you’re currently using (great for screenshotting things inside of apps or web browser) you can hold down the Alt key while pressing Print Screen instead.
Unlike mobile devices, the image won’t be automatically saved, but will instead be copied to your clipboard, which means it’s saved as a copy that you’ll need to paste somewhere in order to view it. Open up the Paint app, included with all versions of Windows, and press Control+V. Once the screenshot pops up you can click File and then Save As to keep a copy for future use.
Mac
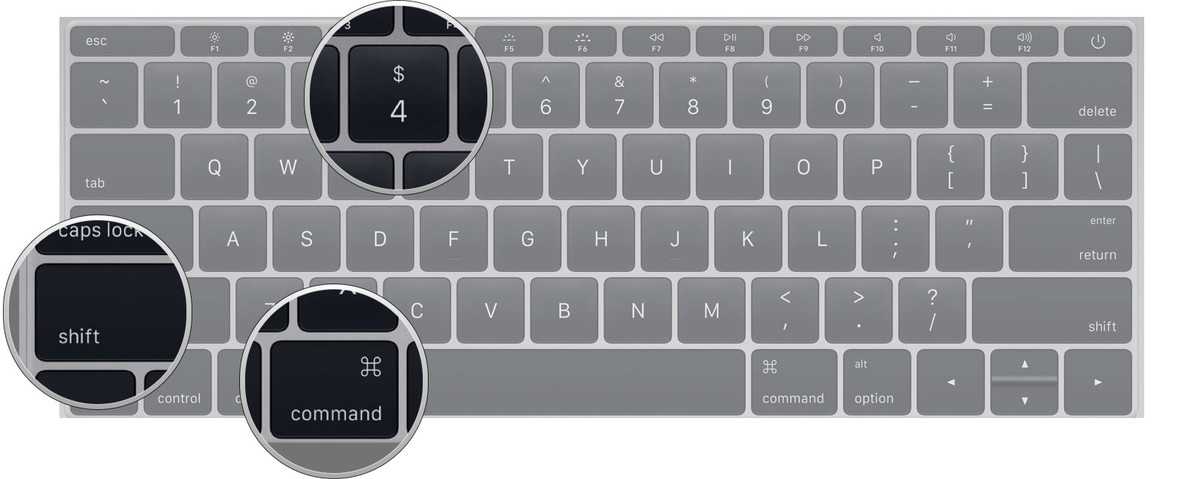 Mac
MacApple’s computer operating system Mac OS includes a similar screenshot feature, with a twist. Pressing Shift+Command+3 will snap an image of your entire screen and save it automatically as a file to your desktop. It’s simple and easy. But if you want to get a bit more exact you can also press Shift+Command+4, which will turn your mouse cursor into a small crosshair that you can click drag across your screen. Click and hold on any part of your screen and drag the window to the size you want it. As soon as you release your mouse button the screenshot will capture everything within the box, saving the image to your desktop.